

- Minecraft Server 1.19 is Live!
- Monster Hunter Sunbreak Out Now!
- WoW Season 4 Starting 8/2/2022
Search the Community
Showing results for tags 'esper'.
Found 3 results
-
Hey guys! Got asked to post the parses of a RMT set "Bird" vs the Storm builds. Links to imgur below. RMT Bird build Abilities used were T8 Tkstrike, T8 Mind Burst, T8 CB, T1 Haunt, base Reap and spectral swarm and locus Storm build Abilities used were T8 Tkstrike, T8 Storm, T8 Haunt, T1 Spectral Swarm, base Reap and CB and locus Barring any human error on my part, these are as accurate as I could do at the time.
-
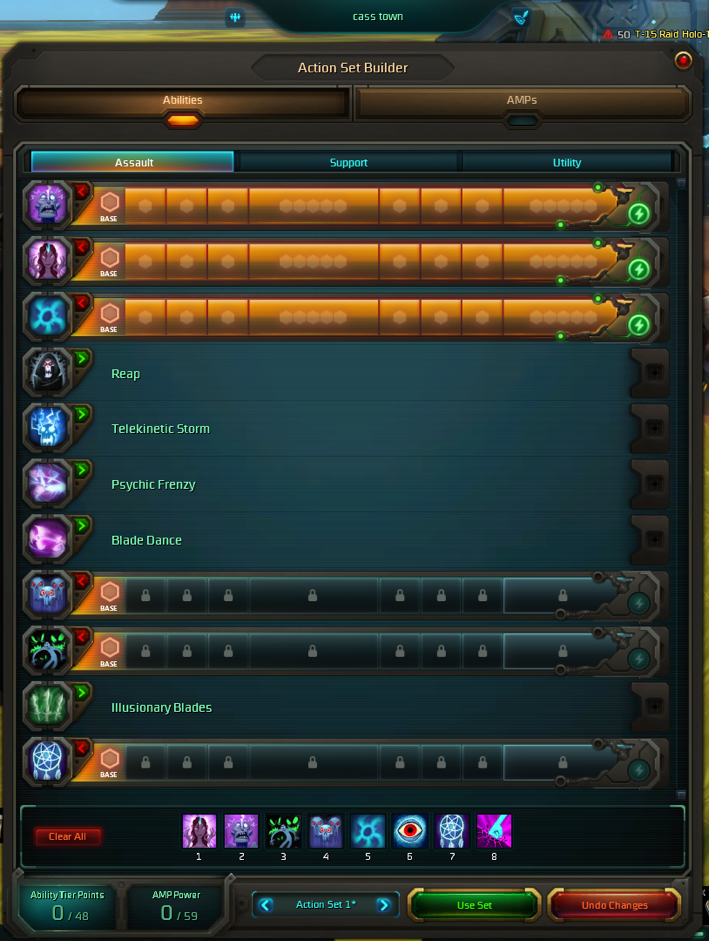
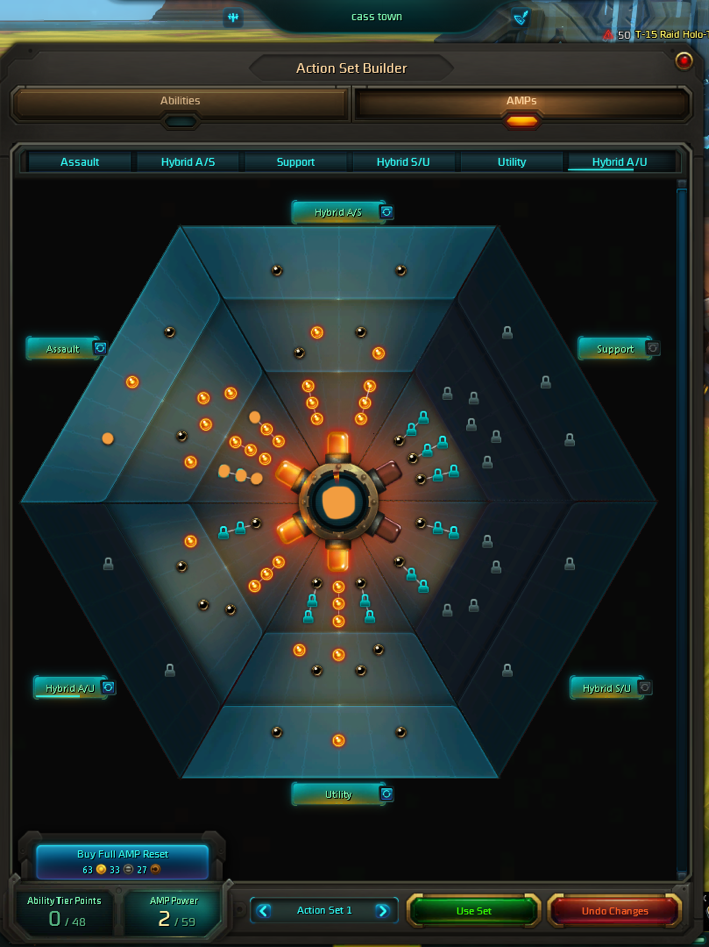
Esper DPS Guide [Drop 8 or whatever this is now] By Cassious >> May 16th 2017 Welcome, Are interested in being a badass, magic swinging, illusionary trickery, face rolling playstyle, and the notorious “Bird”? Well then this guide is for you! This guide will be a build and continuation of the style and format of the Enigma drop 6 guide (so shout out to Daruka). This focus of this guide will be how to DPS as an Esper for end game PvE content such as raiding. For the most part, I will be assuming you have a decent and basic background and understanding of the game. This is geared towards level 50 players. Hope you like, and leave comments! About the Author: I have been playing Esper as my main for about a year now; I have all classes at 50, and have raided on all 6 of them. From my experience, I find Espers to be the most face rolling and enjoyable class. It is not that hard to master this playstyle and is quite fun! I have done a bit of theory crafting and testing to try and find the most efficient and highest dps build. If you have any comments or questions, please let me know! Basics What is an Esper? Espers are illusion masters and can use psychotic powers to mess shit up. We have weapons that sit on our back that don’t do anything, but we can summon psiblades and many more! Armor Espers are one of the two light armor classes, the other being Spellslingers. So when that light token drops, fight tooth and nail for it. Weapon Espers have a Psi-Blade that allows us to summon deadly projections and pets. Limited Action Set (LAS) In WildStar we have a bar of up to 8 class specific abilities to use in fights and in general. In general, this will be referred to as your LAS Interrupt Armor Some enemies in the game will have what is called an interrupt armor. This armor can be broken with some CC abilities in the utility branch such Crush! As an Esper you can go up to 4 interrupt armor removal. Moment of Opportunity (MoO) This is what happens when you interrupt a casted ability from an enemy there will be a moment of opportunity where the enemy’s health bar will turn purple and they will get stunned. This will allow for increased damage on them! Raid Content Genetic Archives: (GA) is the first entry level raid. This raid drops base level gear of ilv 100. It is composed of 6 boses: Experiment X-89, Kurlak the Defiler, Phagemaw, Phagetech Prototypes, Phagetech Convergance, and Ohmna . Datascape: (DS) is the Second level raid. The base level gear is of ilv 120. It consists of 9 boss fights: System Dameons, Lattice, Limbo, Malstorm, Gloomclaw, three pairs of the 6 Elemental bosses, and Avatus. Redmoon Terror: (RMT) is the latest (and possibly last) raid in Wildstar. It is broken down into two sections. Will get into this more later. Resources There are two major resources for Espers: Psi Points These are generated and used by most of our abilities, our major casting building spells are Telekinetic Strike and Psychic Frenzy for DPS. Our major damage comes from our abilities that consume Psi points such as Mind Burst (BIRD!). Focus This is mostly for support based abilities used to heal. As a DPS spec you will not need to worry about this so much. Stats Primary Stats: Strikethrough: Reduces the chance that a foe can deflect your attack. (st that exceeds the foes deflect rate is then converted into armor pierce) Critical Hit Chance: The chance that you will critically hit a foe (soft cap is at 30%) Critical Hit Severity: Factors the critical hits damage by that percent (soft cap is at 250%) Multi-Hit Chance: The chance for each application of damage to applied an additional time at a reduced value (soft cap is at 60%) Multi-Hit Severity: Factors the multi-hits damage by that percent Vigor: While you have full health, your damage is increased by that percent, scales with percentage of health you have (soft cap is at 30%) Armor Pierce: Your attacks pierce through that percent of the foe’s mitigation Secondary Stats: *ehh does stuff Heroism: Tenacity: Hope: Espers & Critical Hit Chance Now a vast majority of our abilities and AMPs will have some proc to add or increase Critical Hit chance and Critical Hit Severity. This combined with the fact that we have less “hits” or attacks per second than some other classes, means that for Espers, Critical Hit is preferred over Multi-Hit. Stat Priority and set up: Strikethrough should be up to a certain cap depending on your content level. Dungeons: 8%* Genetic Archives: 12%* Dataspace: 17%* Redmoon Terror: 19%* *note: so you can use the fusion hand rune “True Strike” that will add ~2.5% strikethrough so you would subtract 2.5% from whatever the above number is! Critical Hit / Critical Severity build (Mind Burst (BIRD!) or Telekinetic Strom): You should try to follow this model for your stats in order of Priority: Strikethrough* > Critical Hit Chance** > Critical Hit Severity > Vigor > Multi-hit *Now you only need to get your Strikethrough up to the cap listed below, after that focus on Critical Hit Chance **Now the soft cap for Critical Hit is 30%, so it is best to target to get your critical Hit Chance to around 18-23% Runes Fusion Runes Head Deadly Blows Special: Deadly blows: when you critically hit with a direct damage attack, gain an empower for 5 seconds. Empower: Increases critical hit severity by 248. Stacks 5 times. Chest Flurry Special: Flurry: When you critically hit with a direct damage attack, gain an empower for 5 seconds. Empower: Increases Multi-Hit rating by 124 stacks 5 times. When you Multi-Hit with a direct damage attack, gain and empower for 5 seconds. Empower: Increases critical Hit rate by 124 stacks 5 times. Or Full Strength Special: Full Strength: Gain and empower based on your health. Empower: Increases Vigor rating by x and lifesteal by x. Hands* True Strike: Special: True strike: When you land a direct damage attack, gain an empower for 5 seconds and apply an expose to the target for 5 seconds. Empower: Increases strikethrough rating by 500. Expose: reduces deflect chance by 2.5% *NOTE: You do not need to use this rune! The only reason you would use this rune is because you are not quite at the strikethrough cap (Discussed below). Weapon* Mordechai Redmoon Ammunition Fusion Rune: Melee Build Special: Detonation: Your direct damage attacks have a 10% chance to Detonate, dealing technology damage to the target and 4 foes with 4m of the target. can only occur every 1 second. Venom Fusion Rune: Ranged Build Special: Venom: Your direct damage attacks apply venom to the target. Venom deals 329 technology damage every 1 second for 5 seconds. *NOTE: while there is a split preference between which of the two to use, I find that Venom is more consistent with damage, since Espers hit less per second than a class like Medics and Engineers. Now Detonation can be better, but you would need to be making far more hits a second for this. Class Rune Sets Now there are six class rune sets, three of which are for healing; so we only be talking about the dps ones. The first one being the ilv 100 Rune set from GA: Mental Prowess, the next is the ilv 120 Rune set from DS: Fiendish, and finally the 140 RMT Rune set: Déjà vu. *Note: The best thing you can do is to put this rune set in a pair of Elden Gauntlets (the ones drop from dungeons that you need to imbue through GA. The bonus on this will equate to about a 2-3% of your damage and makes it worthwhile until you get ~145 hands). If you do not have Gauntlets you can put them into your Shoulders, Pants, or boots if you want. Mental Prowess: 2 power: 0.18% critical hit chance 3 power: 0.80% critical hit severity 4 power: Mental Prowess: When going above 3 Psi Points gain an Empower for 4’s. Empower: Increases Magic damage dealt by 4%. 5 power: 0.30% strikethrough 6 power: 0.28% critical hit chance 7 power: 1.20% critical hit severity 8 power: Mental Prowess: Creates a field that last 10’s. While in the field consumers that deal damage reduc the cooldown on Assault abilities by 2.5’s. *Note: This should be the second class set you get, and should go into a 120 piece of gear. I recommend using either your shoulders, pants, or boots. Fiendish: 2 power: 0.21% vigor 3 power: 0.23% strikethrough 4 power: Fiendish: Upon generating a Psi Point, gain an Empower for 3’s. Empower increases Magic Damage Dealt by 1% per stack. Stacks 5 times. 5 power: 0.30% vigor 6 power: 0.33% strikethrough 7 power: 0.36% vigor 8 power: Fiendish: At 3 or more stacks of Fiendish, your Telekinetic Strike and Psychic Frenzy deal an additional 629 Magic damage to foes. *Note: This is the last class set you will be getting, and can only go into your helm, shoulders, or legs. You will be able to buy Risen Class Foci: Minor from the RMT rep vendor for 10 Triploons per foci. When you get to the 2/3 mark, You will need to run the Mind Burst (BIRD!) build. Déjà vu: 1 power: 1.50% strikethrough 2 power: Déjà vu: Casting Mind Burst (BIRD!) with 3 or more Psi Points grants a charge of Concentrated Blade 3 power: Déjà vu: Every third cast of Mid Burst (BIRD!) with 3 or more Psi Points triggers an additional Mind Burst (BIRD!) after 0.5’s *There is also an Augmenters set, but nobody will realistically get this, also its more multi hit so it is not as important. Regular Rune Sets Here we will mostly be using Devastation for our gear, as the Critical hit is very important for our build. Now you should be trying to use the 2 set bonus runes in your gear to maximize our set. For ilv 90 and up use the pure ilv 100 runes, for ilv 110 gear and up use the divine 120 runes, and for ilv 130 gear and up use the risen 140 runes. Devastation: 2 power: 0.21% strikethrough 3 power: 0.20% critical hit chance 4 power: 0.90% critical hit severity 5 power: 0.25% critical hit chance 6 power: 1.10% critical hit severity Now we can use Onslaught to fill out our gear that has one or rune slots left. We Primarily use the Onslaught Vigor runes, but we can use Strikethrough if you are not at the strikethrough cap. Onslaught: 2 power: 0.21% vigor 3 power: 0.24% Strikethrough - - - Builds *These builds can be adjusted for different stats to better fit your situation. Note: These builds all are considering that you have max ability and AMP points without using the Primal Matrix Pre-RMT Class Set Build This Build is for those who do not have the RMT Class set quite yet, or need to run Telekinetic Storm for the deflect debuff. This build also works better for lower Critical Hit Severity builds (ie. lower ilv gear). LAS and Abilities So here we put our ability points, in order of priority, in Mind Burst (BIRD!) (or use Telekinetic Storm instead for the deflect debuff) to Tier 8, Telekinetic Strike to Tier 8, and Haunt to Tier 8. You also will want to use the following at Tier 0: Concentrated Blade, Spectral Swarm, and Reap. Fixation is optional, but I highly recommend using it. This will leave you with one open utility spot; so I put Crush, our interrupter, in as the last ability. If you need to take a second utility ability I would recommend either taking out Reap, this is more of a matter of preference and depends on your AMP points. AMP Points Now you can customize the amps as much as you want. But after messing around I found these can make a pretty solid build. Now If you only have 57 (the max amount without primal) I can leave 2 out of Armor pierce. RMT Set Build This Build is for when you have at least 2/3 or 3/3 of your RMT Class set. Now there is a slightly different rotation for when you get this class set and have Concentrated blades at Tier 8. Now that your 3 Psi point or higher Mindburst (BIRD!) adds another concentrated blade, we want ot put points in to blade instead of Haunt. LAS and Abilities So this is almost identical to the above build, however now we run Concentrated Blade at Tier 8 instead of Haunt. The AMPs are also the same for the most part RMT Set & Primal Matrix Build This is still new stuff so here is where things may or may not be 100%. Please share suggestions and comments! So now let’s say that you have all your Amp and Ability points, all three Class sets, and now are filling out your Primal Matrix. So the New Esper dps ability is “Locus of Power” and allows you to place a small telegraph under your feet that if you stand it, you do extra damage. This build is a continuation off of the RMT set one. LAS and Abilities Now *NOTE: When you get your other 9 Ability points out of your Primal Matrix, I would put them into Locus of Power to bring it to Tier 4! The Key thing in this build is that you will place your Locus of power inside your Mental Prowess ring and stand still to do lots of damage! Then with the AMP to rest cooldowns by 45% and Fixation’s 20% reduction you should be able to keep popping your Locus of Power up! AMP Points* Now when you hit 66 Amp points you can do a lot of different Amp possibilities! Now you can do something similar or different from this, but I would recommend to use this build IF you also have your max ability points as well. Rotations Pre-RMT Class set build This rotation is very simple! Opener: Face roll on keyboard pressing all the buttons and using all the abilities! Priority Order: 1) Reap and Spectral Swarm are off the GCD, and should be cast as soon as they get off cooldown 2) Haunt should always be cast on cooldown 3) Spectral Form and your Gadget should be cast on cooldown usually 4) Concentrated Blade should be cast during the GCD after Casting a finisher 5) Telekinetic Strike is your builder, and should be cast when you cannot cast anything else 6) Cast Finisher (Mind burst or Telekinetic Storm) at +5 Psi Points Now this becomes just a game of learning timing and being able to cast your finisher as soon as you hit +5 Psi Points and being able to build back up to 5 as soon as you can. RMT Class set build This rotation has a bit more to it. Opener: Launch all three concentrated blades, THEN Face roll! *this allows you to generate one back after casting your Mind Burst (BIRD!) Priority Order: 1) Reap and Spectral Swarm are off the GCD, and should be cast as soon as they get off cooldown 2) Haunt should always be cast on cooldown 3) Spectral Form and your Gadget should be cast on cooldown usually 4) Concentrated Blade should be cast during the GCD after Casting Mind Burst (BIRD!), as it will generate more! 5) Telekinetic Strike should be cast when you cannot cast anything else 6) Cast Mind Burst (BIRD!) at +5 Psi Points The overall feel is very similar to that of the Pre-RMT Class set build, you just need to learn how to now cast the concentrated blades in-between. RMT Class set & Primal Matrix build This rotation is essentially the same thing as above! The only difference now being that you should cast your Locus of Power right before you start so that you have all your opener go off inside it for the buff! Now you want to cast Locus of Power right after you cast a Builder for maximum casting time. Always try to cast one while you can off cooldown! So that’s all folks! Thank you for reading through this, I hope it was helpful! Again, I really would appreciate some positive critical feedback! So if you see a mistake in here, or have a question/comment on something I wrote, please feel free to say so! And remember, BIRD!

-
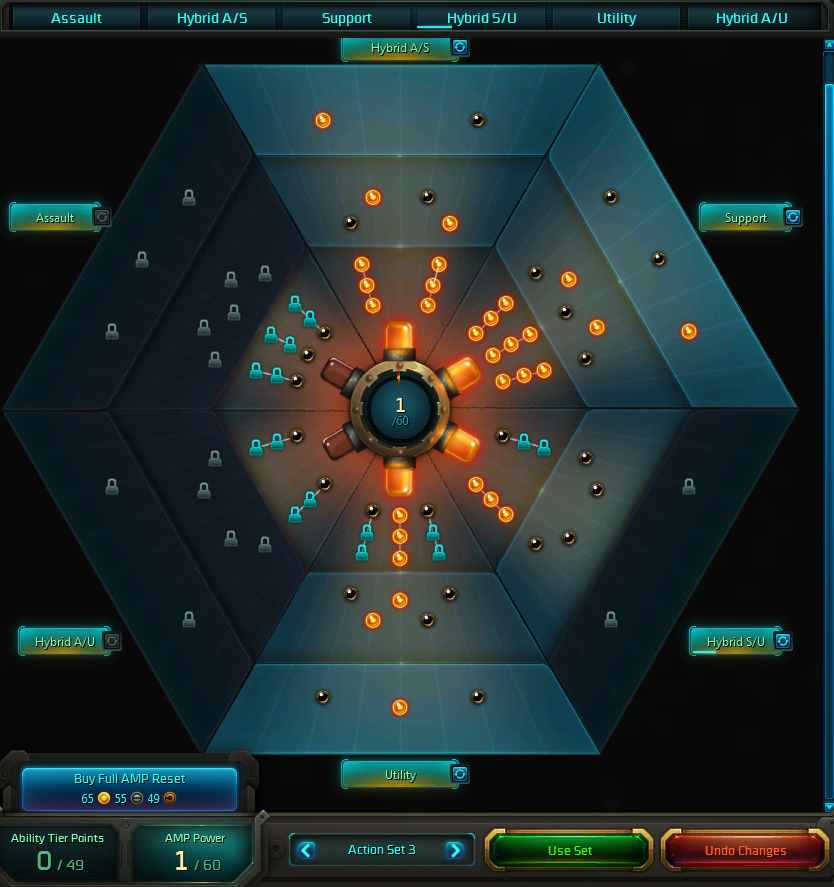
Intro Hey guys! Most of my information comes from this guide link here but I will give my experience as well. Kyndig is our full-time raid Esper healer so I'm sure he'll chime in on most of the stuff I write up as he has more experience. Builds General heal build Base bolster, T4 Soothe, T4 Reverie, T4 Pyro, T4 Fixation, T4 Warden, T4 Mental Boon, 1 utility slot. If you have more Ability points, plug them into Reverie. Decent AoE heals, good mix of burst healing and sustained healing. If you feel you need more interrupts, cleanse, CC break drop mental boon and tier up reverie with remaining ability points going to soothe. Single Target tank/lattice/gloomclaw build base bolster, T8 Mind over Body, T4 Reverie, T4 Mending Banner, T4 Fixation, T4 Pyro, 2 utility slots. On gloomclaw, stand in healing circle and spam your builders while using mending banner as quickly as possible. Also, bring a cc break in case you get the egg on last phase. The T4 Reverie is to help healing raid on your side. If you need more raid heals taking Warden isn't a bad idea either but it's usually not needed. On Lattice, same idea as gloomclaw you just heal the wall instead of an elemental. Spam builders and use Mending Banner in as short of time as possible. Runes There's two ways people go here. Neither are really wrong it's just depends on the raid in terms of the type, burst or sustained, of damage that will go out. Pre-RMT seems to be more favorable to gear/rune toward Multi-hit/Multi-hit severity since damage doesn't usually come out as bursty as it does in RMT. RMT gearing/runing towards critical hit/severity will do better for the reasons stated earlier. That being said, Cynosure 6/6 Concentration 2/6 would be for MH gearing on most slots except for fusions. On gear that takes fusions, 6/6 Cynosure and 4/6 Concentration on slots would be ideal. Keep in mind you can also get more MH from striker set even though the set is better suited for dps than heals. For RMT, 6/6 Resurgence 2/6 Concentration on fusion slots and 6/6 Resurgence 4/6 Concentration on non fusion pieces. I'll list fusions I use below: Weapon - Overflow Head - Meditation Chest -Conservation Hands -Protection Runing for RMT I'd refer to the link I listed above as he shows a screenshot of how he has runed. I'll list how I've runed my gear to this point below and then talk about GA/DS sets after. I have the GA set Guardian 8/8, well 9/8 since RMT runes upgraded give me that. I didn't take the DS set as I felt it wasn't as useful as just having the "right stats" to heal more efficiently. My reasoning here is because the 4/8 DS set does less than the fusion rune "Protector" and that fusion rune takes one rune slot. Also, even the 8/8 DS set doesn't seem that great to me. This is what the 8/8 Hardened set does: Bolster now heals for an additional 212 health ever second for 3 seconds to 5 allies near the target. Additionally, Bolster grants 10% armor to an ally. While the armor seems nice, especially on tanks, 10% really isn't much and even the first part of the bonus about turning bolster into an AoE heal so long as the target of the Bolster is near allies doesn't seem like it'll do much in a raid with little to no melee. Now that being said, I might try to get it at some point because the rune's stats are useful to the Critical Hit build I'm running. Still, I'm in no real rush to grab up the DS set. More on Stats!!! Be warned, I'm gonna talk about stats. If that bores you, sorry, I want to cement down what our stats actually do for our healing and that in turn makes you at least a better healer even if you have no idea what you are doing. First I want to link my stats I have right now unbuffed. Keep in mind I'm raiding in RMT so I have my gear runed for Critical Hit setup. For a Multi-Hit setup having about 55-57% MH will be plenty to heal efficiently. Multi-Hit gives our heals a chance to heal for a small amount after the initial heal lands. Multi-Hit Severity controls how much of that small heal you get. Critical Hit gives our heals a chance to heal more than they would normally. Critical Hit Severity controls just how much more of a heal we land when we crit. Focus pool is our "mana" from other MMO's and Focus Recovery Rate is how much our Focus is returned to us. Intensity increases healing from our base heal times the % Intensity but also increases the focus cost by the same amount. So I won't talk much about the throughput stats, MH/MHS/Crit/Crit Sev/Intensity other than stick with one or the other in terms of MH or Crit. Have some Intensity but not too much. I currently am at about 18% Intensity and I've had to make changes to my FP/FRR to make up for that, so don't go too crazy with Intensity unless you just wanna pad your healing numbers. Focus Pool and FRR is a balancing act. Having too much of a Focus Pool with low FRR is just as detrimental as having too much FRR and not enough Focus Pool. Simply, have a balance of both to where you won't run out of focus during a long fight. For example, with my FP and FRR, I can count maybe on one hand where I've run out of focus in a raid fight if that helps. AMPs This is my AMP setup for my general healing build. Nothing special. Have Bingo for added Psi point generation just in case I need some burst heals. This is my setup for my Single-target build. Notable AMP's are the Build-Up/Hard to Hit works well with our single target Mind over Body heal. I'd grab Bingo too for reasons stated above. Those AMP's allow us to heal tanks more efficiently. Healing as an Esper/Tricks of the trade The whole idea behind Esper healing is to build Psi points to then use finishers to produce burst or sustained healing depending on the damage coming out. Our role is very flexible meaning we can heal tanks and raid decently. Carbine appears, with the RMT set, to want us to tank heal more so than raid heal, but I don't have the RMT set and I don't have problems healing tanks with the right build. In some special fights, gloomclaw and lattice, the single target build will blow other healers away in terms of hps on that elemental/lattice wall. Burst rotations involve maximizing Psi point generation using spells that build Psi points to get more finishers off in as short time period. It's very important to know all boss encounters before healing them as you can better heal the encounter knowing what spells in your arsenal will be most effective. Lastly, come prepared for raids with food, boosts, etc. whatever you need to do your job. People tend to like their healers more if they can count on them! As far as what type you should use, it really depends on where your stats are unbuffed. Think this is all I can offer for now. Please let me know if I missed anything!

.png.4826950d4aa7089fab2664a2068b2a8e.png)
.png.eac78b93a51e972904f258f2ef844fac.png)


Popular Topics
-
 Esper Healing Guide Started
 -
 Official Ark Server Settings Started
 -
 CPU Miner Coin - Raven Coin Started
 -
 ESPER DPS Started
 -
 Request Access to Server Started
 -
Battlefield V Started
About us
Warpigs is a semi-hardcore multi game community, for both MMOs and other genres. Our core, which has largely remained the same, started back in 2014. Warpigs first got started in Wildstar and has since branched out to several other game including, Black Desert Online, Overwatch, Heroes of the Storm as some of our most active games. We also have a strong internal following for both Dauntless and Ashes of Creation.
Warpigs function as a tight knit family-esque guild, which is not to say that our conversations are G-rated. Quite the opposite, but when you're one of us, we've got your back. Words fly pretty freely, and I'm always of the opinion that if you play an MMO, or any game with a social player base, you need thick skin and know not to take things personally. With that being said, we are a well organised and have a fairly mature membership, and as such we offer a very stable guild that we hope will be here for many more years to come.
Warpigs are dedicated to a friendly, team focused, fun-loving gaming environment where every member is important and not just a number on a roster. We seek to foster long term friendships among members and enhance the online gaming experience by virtue of those friendships.